iPad Pro DNG, Monochrome Quality

Shooting Monochrome DNG on iPad Pro 10.5

A couple of days back I posted a preview test of the iPad Pros’ DNG potential, this is a short follow-up that looks at using iPad Pro DNG for monochrome.

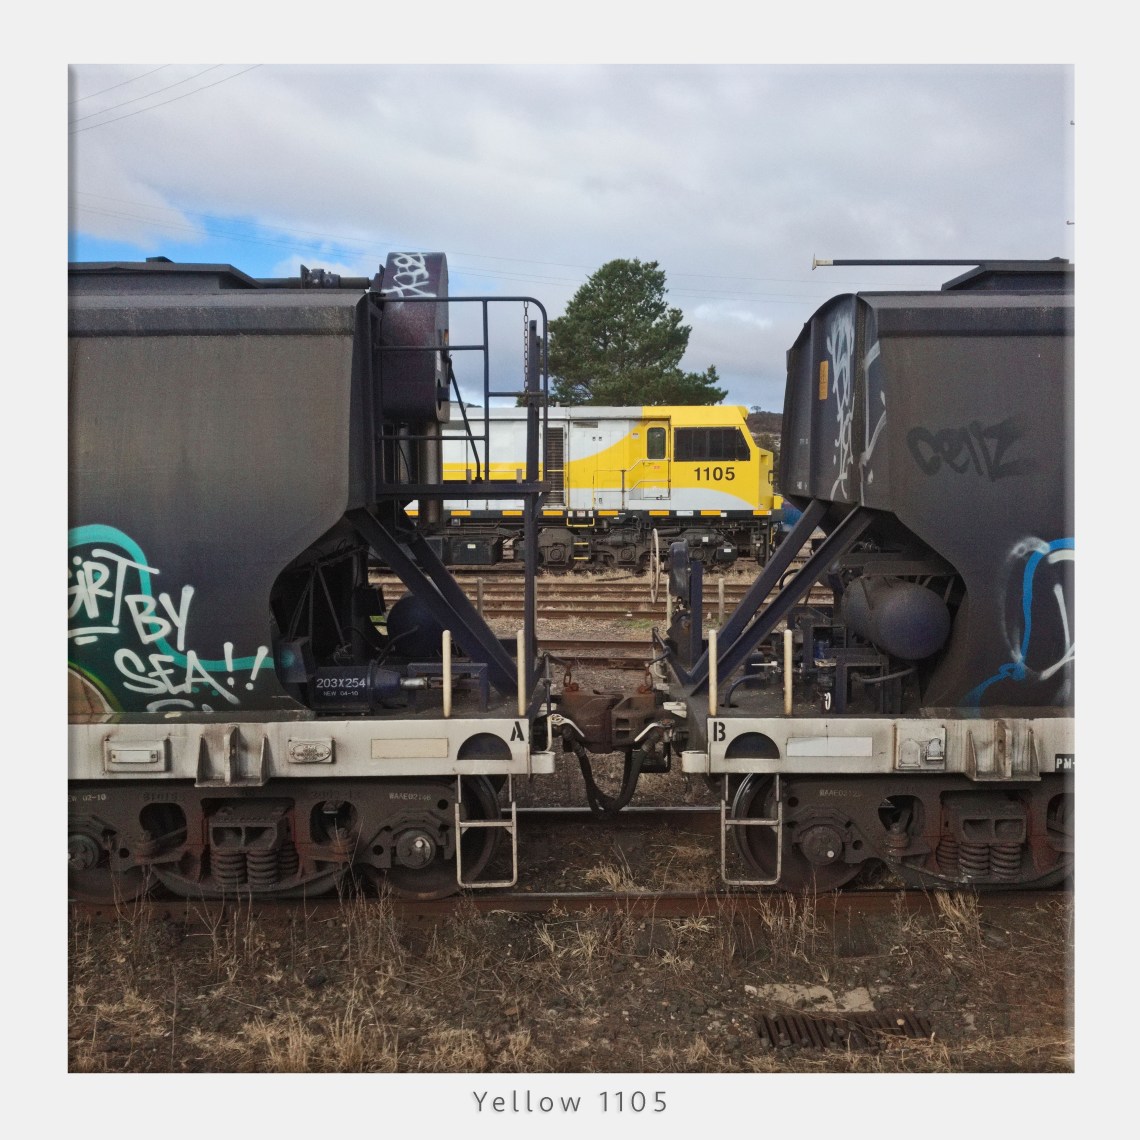
Yesterday I took my iPad Pro down to my regular camera testing ground, Goulburn’s Historic Railway Precinct.  The precinct has all the elements you need to run real-world testing, high contrast situations, muted and bright colours, lots of fine detail, near and very distant elements.  Been using it for years, the really good thing is I can make meaningful evaluations between cameras from different times as I’m comparing apples to apples, as they say.

Typical of Goulburn in winter it was bitterly cold, I’m normally fine with that, but we’ve now moved into Goulburn’s well-known “Windy months”.  Basically the wind yesterday would blow a pitbull of a chain, it was supposed to have been around 50km per hr but the railway station has a national reputation of being “windy on steroids” and it didn’t disappoint.

I mention all this because it just hammered home my main criticisms of using the iPad outside for photos, basically it’s a sail, catching the wind perfectly and making it very hard to get sharp shots in less than calm conditions – In Goulburn that would stuff you up around 286 days of the year (according to official weather data)!

Remember the iPad Pro has no image stabilisation, but I did use the “delay stabilisation in ProCamera to take the test frames, I still got a few blurry stinkers!

Anyhow, I was wanted to determine a couple of things:

First using my *TLC-DNG methods how would the files handle the conversion to monochrome.  

And second, how did the resolution compare to shots I had taken at the railway on the iPhone 6S plus using the same methods.

You can check out the iPad Pro pics at the end of the blog, but here’s what I can tell you in addition to the comments I made in the previous post.

First, the ergonomics for handheld shooting are just bloody awful, especially in the wind, I seriously don’t know how folks do this with any sense of comfort.  I’m sure it would all be fine on a tripod but I don’t have an adapter at present to try that.

I checked some adapters out on eBay last night and frankly most looked decidedly dodgy – and those that didn’t cost stupid money to have shipped to OZ from the US!

Honestly, I just don’t think I could use the iPad Pro handheld, I spent the whole time panicking I was going to have a very expensive accident.

But now the good news…

The *TLC-DNG files are without a doubt much better than those from the iPhone 6S Plus, in every aspect, but a couple of aspects are particularly noteworthy.

The older camera modules show strong red colour shift in the edges and corners of the image which requires heavy-duty fixing in the Raw extraction phase (Most folk would not know this because Lightroom Mobile for example dials it out automatically).  This colour shift degrades the potential of the file because once corrected is exacerbates the noise on the edges and corners of the frame.

The iPad Pro and I assume the iPhone 7 series cameras have far less red-shift/vignetting natively thus the edited results are consistently much better but note the issue still exists at a lower level.

The second item and I really do love this, the edge clarity of the lens is better.  Again most photographers will never have noticed this shooting JPEGs or perhaps casually tweaked base DNGs, but trust me the corners are much more evenly sharp than with all the previous “i” device camera modules.

Finally, and this excites me, the files convert to monochrome in a very filmic way if you leave the noise reduction dialled out.  Basically, the noise looks rather like fine analogue grain  (think 64 – 125 ISO monochrome films) and it just works a treat.

I’ll finish off by adding that my initial shots in Kiama had me thinking the files were far more pushable than the previous iPhone models files.  Well yep, they are, they can be pushed prodded, poked and stroked much more vigorously.

So it’s all good, except for the ergos, but it all tells me I’m going to love my new iPhone 8 Plus come November….I can hardly wait.

Ok so now you can check out the pic

*TLC stands for True Light Capture and is an advanced capture method I developed many years ago, it is especially useful for iPhone DNG pics and is explained in full detail in “Ultimate iPhone DNG”.

You can buy the book from the iBooks store by clicking on this link below  

https://itunes.apple.com/us/book/ultimate-iphone-dng/id1274334884?ls=1&mt=11


Yellow locomotive flanked by grain freighters taken using DNG on iPhone Pro 10.5
How do iPad Pro DNG files edit?  I was interested in how the TLC-DNG files would edit once extracted, the answer is very well indeed, it’s quite easy to get nicely analogue results, no problems with tonal breakup/banding and colour can be nicely subtle. Importantly the files withstand all sorts of sharpening processes without cracking. It’s all good!
Hidden Loco
iPad Pro DNG Monochrome Quality? The monochrome conversions from the TLC-DNG files look really lovely, the tonality is terrific and detail really well resolved throughout the entire image. Noise (grain) is very analogue and should allow for some great inkjet print results. 
Mens on Goulburn Platform
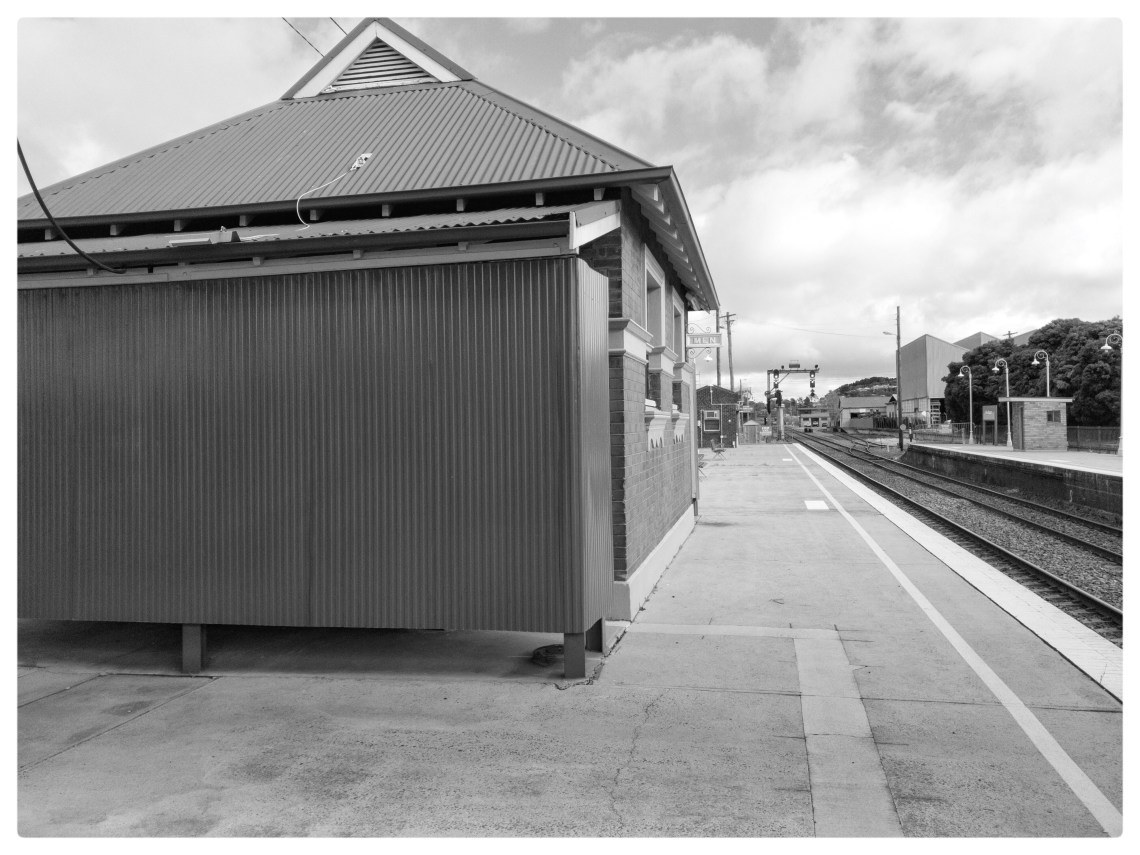
iPad Pro DNG Resolution? You can’t see it at this size but in the full-size image, the bricks on that tiny building under the signals on the middle right can be seen. Which is to say…resolution and detail, in general, are not an issue.
 

iPad Pro 10.5 DNG, wide dynamic range, Goulburn Railway Station, Looking South

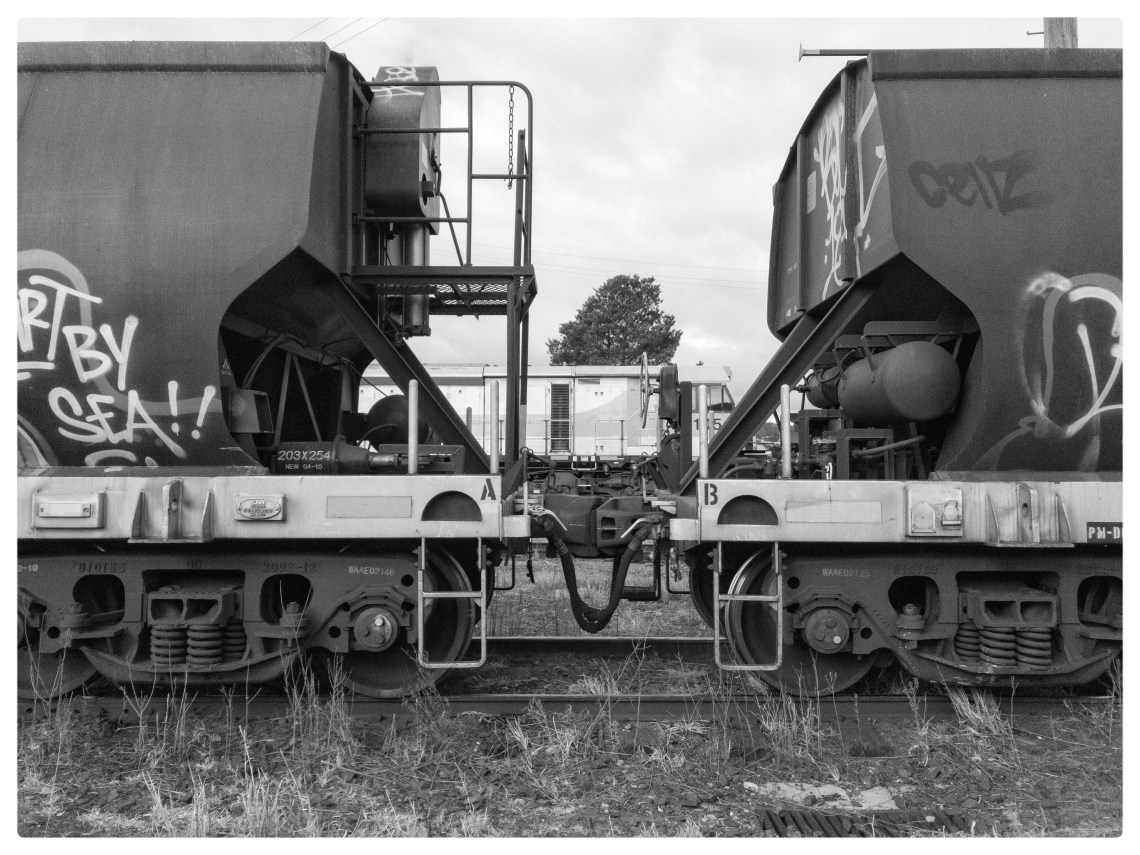
iPad Pro DNG Dynamic Range Ability. The impressive aspect of this test frame is the full tonality from shadow to highlight, this is not a HDR image. The deep shadows have been pushed in the conversion and held together well without breakup. Quite impressive really.
Shooting Monochrome DNG on iPad Pro 10.5
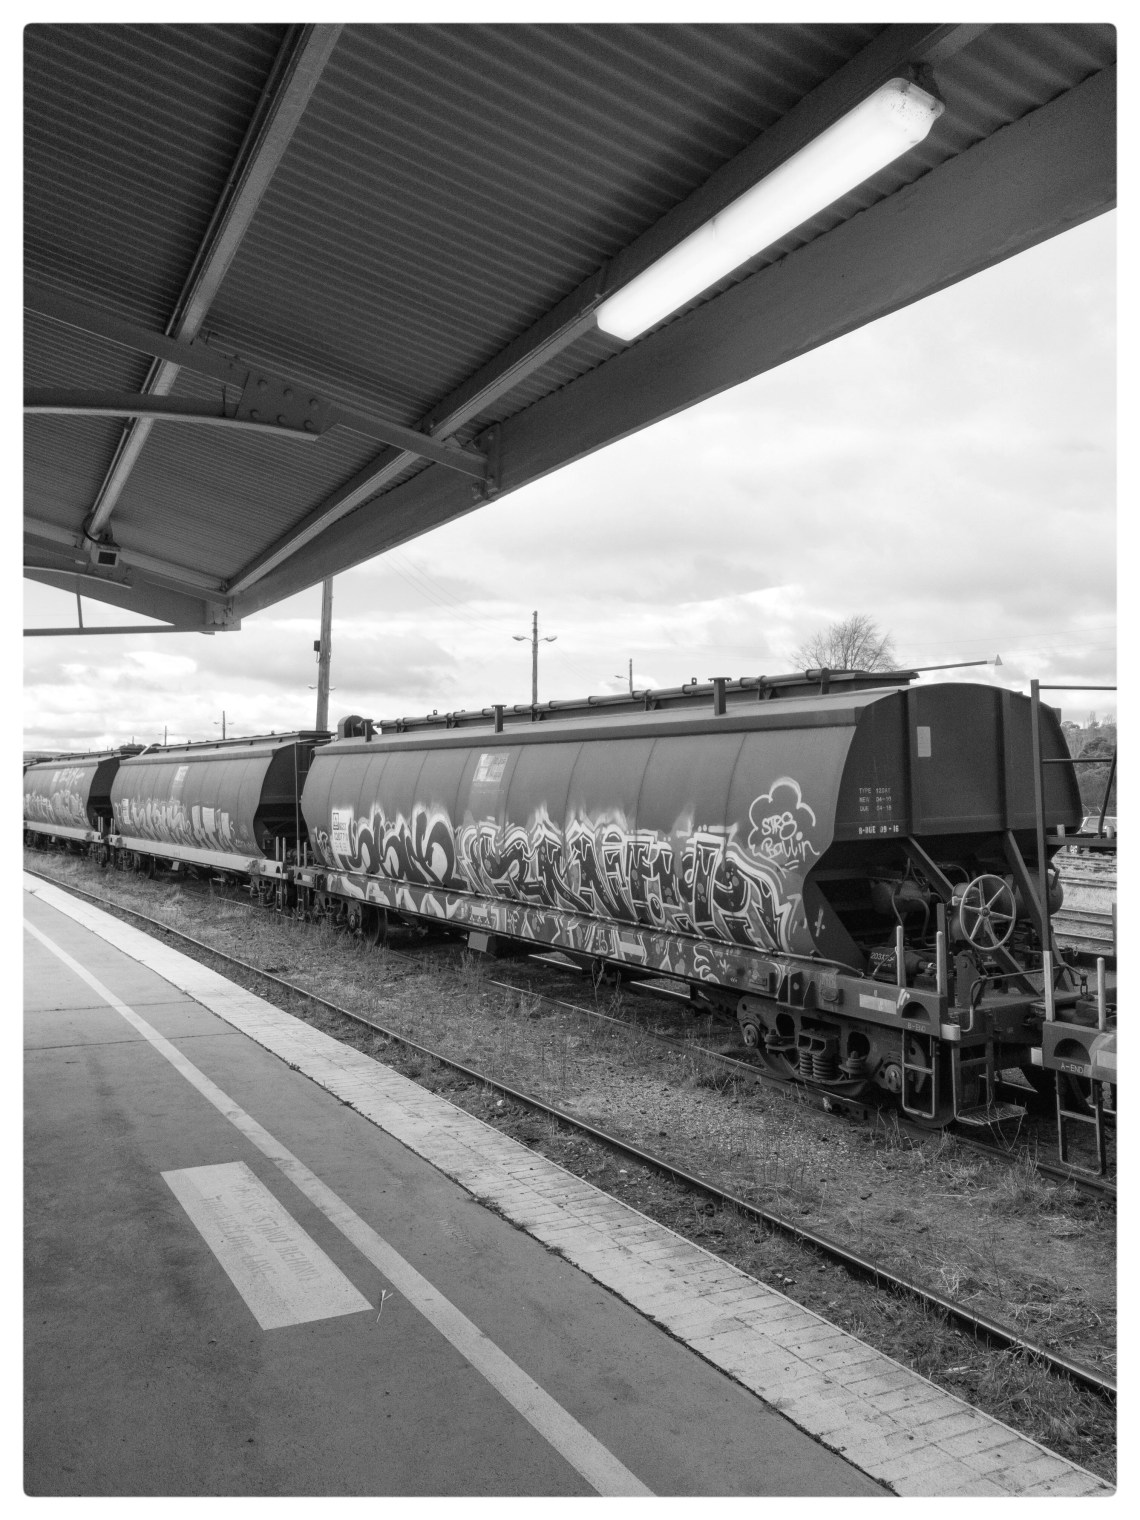
Testing the Dynamic Range of iPad Pro, this shot shows the possibilities, the fluorescent light was the brightest element, the shadows under the carriage are very deep. The result is excellent for a non-HDR capture, nothing is bleached and the dark tones sit where they should, it would be possible to pull more out of the shadows at the expense of a little more noise.
iPad-Pro-10.5in-DNG-Goulburn-Railway-Station-Bridge
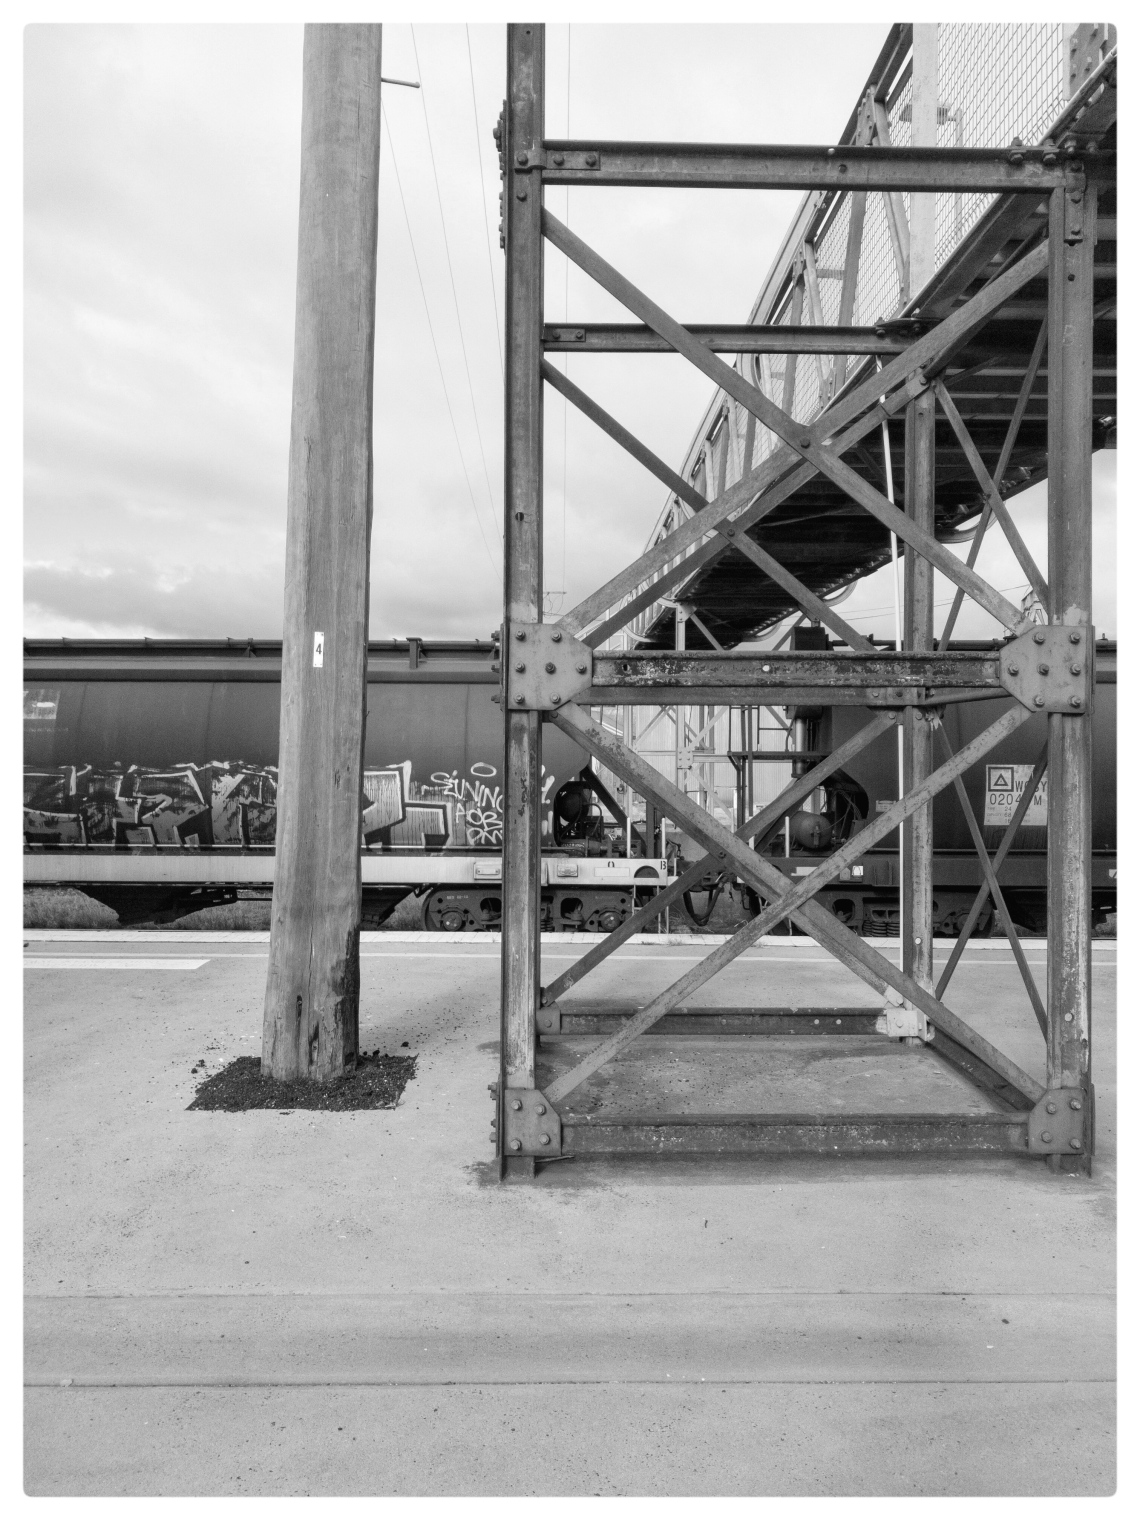
iPad Pro Shadow Recovery with DNGs?  Sometimes test shots work out nice in themselves and I quite like this one, perhaps it’s the layered effect.  The pic shows how the deep shadows (under the bridge) hold up, nothing is clipped either.

Ultimate iPhone DNG….eBook For iPhone Shooters

iPhone DNG, multi frame capture, steam engine pimp in action under low light.

Seems like everyone these days agrees the iPhone is a great camera, true enough, but it can be so much better.

Lots of people simply want to use their iPhone for everything, family portraits, events, holiday pics and more.  Whilst there are still many reasons for photographers to use a regular camera a well-aimed iPhone can get you tantalizingly close to meeting all those needs in a convenient pocketable package.

Shooting with the RAW (DNG) format can turn out iPhone into compact imaging dynamo, all those positives of iPhone shooting remain, the “in your pocket” convenience, speed, ease of use, the great screen, powerful sharing options and more but most of the pesky downsides simply disappear and those deficits that remain are significantly diminished.

Don’t get me wrong, regular iPhone pics are pretty good for snaps and general stuff but the softish images, limited dynamic range, noise, watercolour like rendering and often unpredictable results take the shine off the camera for serious shooters.  You can be sure that with properly captured and processed DNGs those shortcomings will no longer apply.

Of course just shooting in DNG will help, but your images will be better still when you actually know a few extra tricks to use for the capture process and editing. Frankly, I think you’ll be amazed at how good your DNGs can be when you apply an optimised workflow, and great news, it’s all pretty easy to do.

I’ve put together an easy to follow, plain English, jargon-free eBook that will teach you everything you need to know to become an iPhone DNG expert, and I’m confident in saying this just might be the best $14.99 you’ll ever spend on your iPhoneography, maybe even on photography full stop.

Along the way, you’ll learn stuff about image capture and processing that would take months of combing the internet to find and quite honestly you’d probably still fail to uncover the information gems revealed in this eBook.

Amazingly much of what you’ll learn applies to the shooting and editing with any camera, so even if you only occasionally use the iPhone the $14.99 will still be money very well spent.

Ultimate iPhone DNG is 380 pages and 23 Chapters of iPad optimised goodness, take it with you wherever you and your “i” devices go and of course you could pop it onto your Mac or Windows computer as well.

iPhone DNG capture wind blown tree coromandel coast in new zealand converted to monochrome
Monochrome image prove very challenging for the iPhone standard JPEGs, normally the highlights get hopelessly clipped, the shadows blocked up and the textural detail goes MIA and the noise looks terrible, not a problem at all with a well-handled DNG.

So what’s covered?

Three Ways to DNG
The Best Shooting apps
Optimising Capture
Perfect DNG editing
Shooting and Processing Optimal Monochromes
Special Shooting Techniques
Setting up and using Lightroom Mobile
Setting up and Using ProCamera

……and so much more, I’ve even included a comprehensive dictionary of iPhoneography terms

Of course, there are lots of great sample pics of the sorts of real-world things the average person would be shooting, portraits of family, holiday snaps, landscapes, close-ups, and more.  In other words realistic images that don’t require a studio, glamorous paid models and an array of lights, just the sort of photos you could expect to achieve if you put into practice the concepts and methods covered in the book.

So for the price of a coffee and a light snack you can change your iPhone shooting forever, I absolutely promise your pics will be better in every possible technical way.
And just to give you advance notice this is only the first in a series of 6 “Ultimate iPhoneography” eBooks, the next one is already close to completion and covers the fine art of iPhoneography composition!


Buy it on the iBooks Store, click on this link:

https://itunes.apple.com/us/book/ultimate-iphone-dng/id1274334884?ls=1&mt=11


Shooting iPhone DNG for Family Photos

Like lots of photographers I use an iPhone as a regular camera, I love the “in your pocket, unobtrusive, instant feedback” aspect of shooting with the Phone. Being able to easily share snaps with family and friends instantly adds enormously to the appeal…take a shot, tweak a little and airdrop it to my kids or friends over a cuppa, what’s not to love about that.

And of course I get a regular stream of pics and videos of my new Grandson and the Families exploits in return. As a family we carry our visual lives in our collective pockets and handbags, a well-shot snap can convey a wealth of information that words often struggle to say.

I don’t get hung on the idea that a photo should be purely the result of the camera and lens, I’ve always believed that editing and presentation are just as important. I’m convinced good edits can make the idea and message more direct and maybe even more meaningful.  Let’s face it, in the end we’re trying to tell personal stories, express emotions and convey feelings…….with pictures.

Aaron On His Birthday
Yep hard to believe my son is 30 years old, taking a bit of chill time in the coffee shop, the pic has been treated to some selective blur and subtle edits.  I really do love the way that the DNG files work as monochromes.
Aaron and Jain 2
My son Aaron and his partner Jain on his 30th Birthday, this is a TLC-DNG image (you’ll need to buy the book if you want to know about TLC), its taken in full harsh sunlight but the file has edited beautifully and really it looks rather film like. The simulated depth of field certainly adds an extra dimension to the image.

For me the addition of the DNG option for shooting on the iPhone was a huge deal, it opened up an array of options that just weren’t possible with the JPEGs but more importantly, it provides me with files which are nowhere near as brittle and “vastly more editable”.

Now I don’t expect my iPhone or any smartphone to be a paragon of technical excellence but that doesn’t mean it has to be technically hopeless either. The DNG option has expanded the iPhone’s capabilities and turned it into a potentially far more serious photographic tool and one that’s definitely far from a technical disaster.

Longtime iPhone shooters will know exactly what I am talking about with respect to the JPEGs…poor highlight retention, no fine textural detail, watercolor rendering at anything above minimum ISO, rampant banding of blue skies, weird hue shifts on skin tone highlights, we’ve all seen these problems.  iPhone images don’t have to be like that, with DNG everything can be soooooo much better!

I like to edit my iPhone pics, and even edit them to quite serious levels.  I want to make blow-ups if the image is nice enough, I want to crop, I want it all, regardless of what camera I take the photos with.

Yes, of course I could use one of my other cameras, but then I don’t normally take a camera kit to the coffee shop or out to a family dinner, or most places in fact, but I always have my phone.

milton copy
My wonderful Grandson Milton, apple of his Poppies eye, isn’t he just beautiful.  Taken with window light using UniWb DNG and then DOFsimm’d to taste.  The image prints superbly well.

I realize some people might say, look, Brad, you could get that shallow DOF and big blow-ups with the pics with your Sony Nex, your Olympus OM.  Well, sure I could if I had those cameras with me at the time.

I don’t shoot zillions of pics, I’d rather shoot just a few select images, editing them into what I want is pretty quick and relatively painless and just because photos are shot on an iPhone doesn’t mean they need to look half-baked.

Back to that DNG stuff, there’s much to love about it, but for me, the two most important aspects are the increased highlight tonality and the ability to have the fine textural information in the photos preserved.  I know Apple likes to kill noise stone dead so it looks all peachy when the average punter zooms in for some pixel peeping fun but seriously that “wrapped in plastic” look just doesn’t cut it for me.  I have a healthy relationship with noise anyway, we can both get along quite nicely, I’d much rather be given the choice between going plastic or analogue thanks very much.

Basically, the DNGs allow for a more 3D like rendering, being able to hold those near white tones makes the images look far more organic and the increased textural detail adds more shape and form to surfaces and this is evident even without any serious editing.

Back to the editing front, I just love that I can push the tones around in DNG without getting that horrible tonal breakup that seems to afflict most iPhone JPEGs, want to vignette a bit, lighten a shadow, dodge some skin tones, burn some highlights, no problem it all just works much better.

Wendy 57 Today
Wendy, the love of my life, we’ve been together for 40 years, this little snap was taken in one of our favourite coffee shops, it was inside and under dim light but the DNG option made the most of it.  I love that smile even after all these years.

What really gets me excited is when I want to create depth of field effects. I realize a lot of photographers will get more than a bit uppity about this, thinking it’s sort of cheating by denying Olympus of the opportunity to sell me a very nice 25mm f1.2 for my OM camera to do this all automatically for me. (Olympus are about to tempt me with three more very fast f1.2 lenses I believe, I feel movement in of the wallet in my pocket)

Honestly, though I actually have some solid creative reasons for sometimes taking this simulated DOF approach and anyway isn’t this approach much the same as what Apple is already doing with the iPhone 7S Plus and other makers on the cutting edge of experimental camera technology are trying to achieve.

Consider this, with a bit of work I can pretty much get any sort of effect I want, bokeh effects are adjustable, depth of focus controllable, field curvature can be simulated and lot’s more. Fact is I often DOF sim with shots taken at say f3.5 on my regular cameras instead of going down the ultra shallow DOF shooting route, we have choices as they say.

The big advantage with the DNGs for the all this Doffy Sim stuff is that the “in focus areas” are just, well… more in focus. Details are more resolved and they respond far better to a wide array of post-shot sharpening processes, like ultra fine radius sharpening, high-pass filters, noise texturing and more. I look at it this way, it’s always possible to blur sharp bits but it’s not possible to get sharpness out of blur. So starting with a sharp image with a more extensive depth of field and selectively blurring can often be more successful that staring with one with marginal overall sharpness and then trying to add detail back that was lost due to technical depth of field limitations. You’ve probably gathered I’m not a big fan of the “6 eyelashes and half an eyeball in focus” look, but I know lots of folks are…which is fine.

I must point out that I would not attempt any of this Doffy Sim stuff on the iPhone itself, any of the apps I’ve tried to use for these effects are just plain horrible, basically, they lack the fine control you need and it’s just really hard to do on such a small screen. All that said my new iPad Pro is a different beast altogether.

Note: If you do know of an iPhone app that really does this DOF sim stuff well I’d also love to know about!

Lightroom mobile has proven to be a brilliant editing app for dealing initially with the DNGs, I remain seriously impressed be just how good it is.  Using Lightroom in conjunction with Snapseed for fine tunings and effects provides a killer family pic combo. Honestly, the two are just a superb for most needs and it’s utterly amazing that neither will even ask you to remove your wallet from your pocket!

Note that I wouldn’t use either for simulating Depth of Field effects, that’s always down in Photoshop but Snapseed can do some passable simulations if you use the layers functions.

Holly 1
Our little girl, Holly the Collie, frankly she is far too smart for her own good, but she looks a treat in the Autumn leaves and the DNG is quite excellent at fully recording the subtle whites in her coat.

Ultimately I take a sort of hybrid approach with the family and friends iPhone snaps, I shoot in DNG, do an extraction in Lightroom mobile, follow it up with some tweaking in Snapseed and then hand it on to my family and friends via airdrop or email if they don’t have the airdrop option. It normally takes about 4 mins, not instant, but quick enough. Later on, if I decide I like the pic enough I’ll airdrop the pre-edited JPEG to my trusty Mac and give it some Photoshop time. I then re-send the newly cooked result via email to my family and friends.

I don’t normally process family and friends DNGs on the desktop but for some more serious holiday or commercial shots where I want ultimate quality, I’ll cook them in one of my RAW editing programs, usually Iridient Developer, which provides for some serious image quality that will utterly belie the iPhone origins.  (yep, that’s all covered in one of the upcoming books)

In the end, the only thing that I find a bit limiting with the iPhone for family and friends snaps is shooting under really low light (though DNG helps a lot) and the lack of a more telephoto lens.  The standard wide lens does kind of apply its own perspective look to shots, but I’ll upgrade to the new dual-lens iPhone 8 later in the year so that aspect will probably cease to an issue for me.

Wendy at the Food Van
By rights this should be just about an impossible shot, taken under very low light handheld at 1/40 sec, Wendy was actually very strongly backlit with the exposure set to record the highlights, yep it’s a bit grainy but it’s nice grain and I truly treasure this shot,  a great reminder of a lovely but very cold evening we spent with some friends out on the town.  Of course its DNG, a UniWb version in fact.


Get Ultimate iPhone DNG on the iBooks Store:

https://itunes.apple.com/us/book/ultimate-iphone-dng/id1274334884?ls=1&mt=11